
First time login HBL Bank App For Corporate Admin Download APK
First time login – Corporate Admin
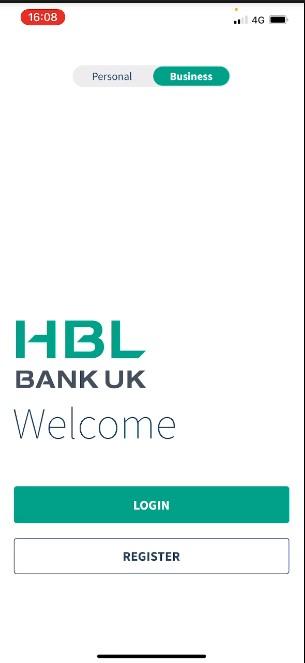
Download the “HBL Bank UK Mobile Banking” application from Google Playstore for Android, or the App Store for iOS operating devices. Once downloaded, select the tab on top of the application for “Business” followed by “Register.”
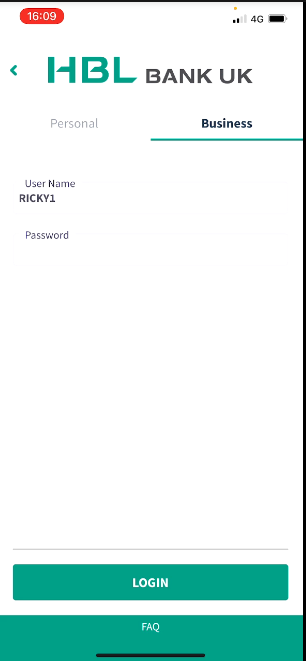
Key in the Username which you had written on the Business Internet Banking Application followed
by the Password which you would had received via Text (SMS). Once completed, tap “Login.”
Creating A New User
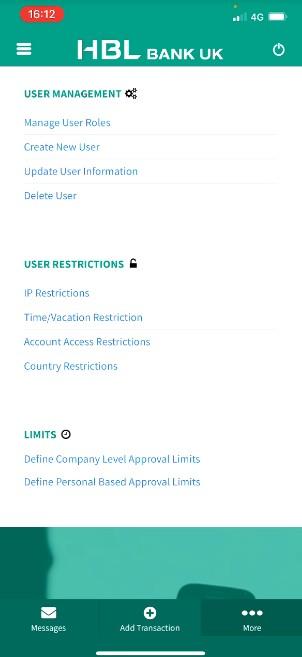
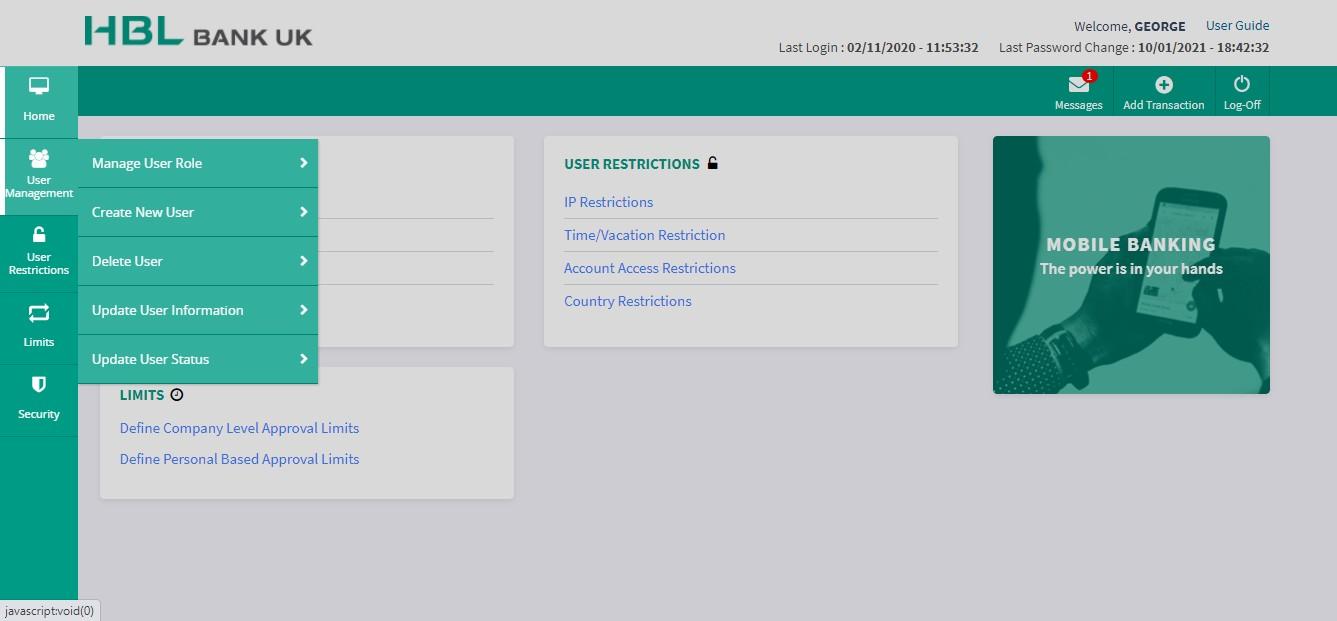
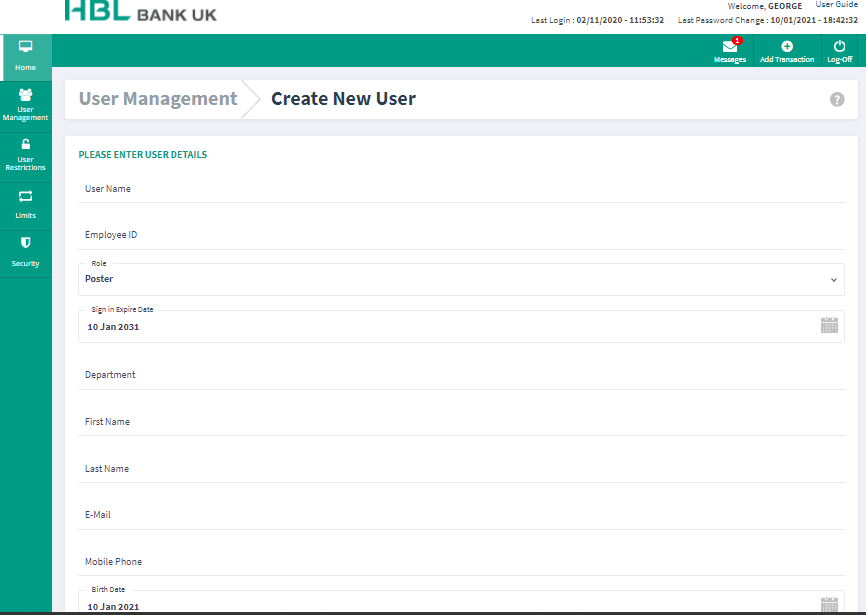
On the main page, navigate to the section titled "User Management" and then select the option labeled "Create New User."

To create a new user, hover your mouse over "User Management" and then select "Create New User."
Complete all the fields for the employee who will be required the relevant role. The roles available are:
Poster
Approver
Inquirer
Supervisor
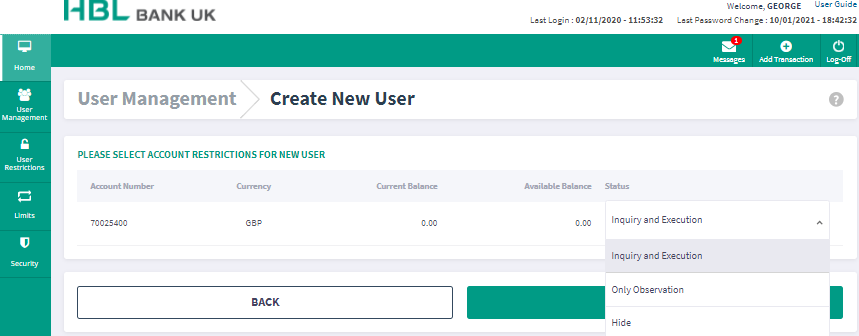
After completing the employee’s details, the next screen will allow how each account can be viewed to the specific user. The options are:
Inquiry and Execution
Only Observation
Hide
Once the appropriate option has been selected, click “Next” to proceed to the next screen.
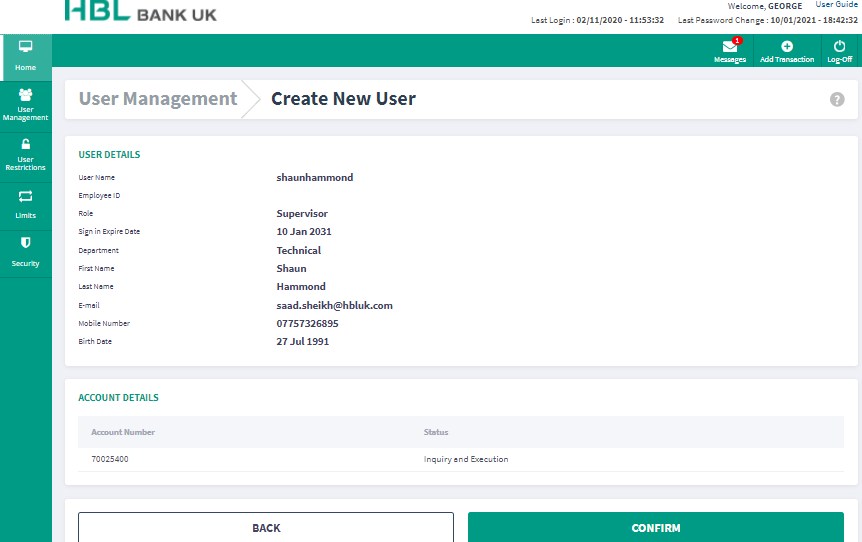
A summary screen will appear to view the details keyed in for the additional user; their Role and their Status for each account opened under HBL Bank UK. Click confirm if you are happy to proceed.
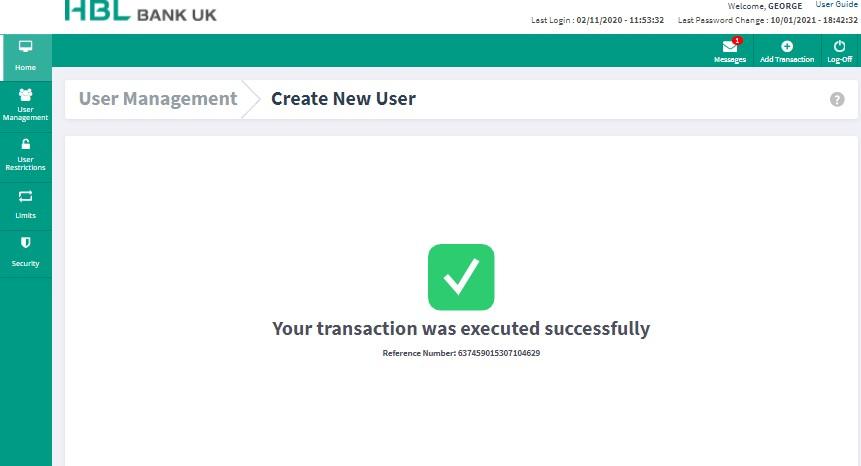
Once you have clicked “Confirm” the new user will receive a mobile text (and email) informing them of their Username and Password.
Manager User Role
To change the role given to a specific user, from the main page click on “Manage User Role” or via the side panel, hover your mouse over “User Management” and click “Manager User Role.”
Then select the user you intend to amend/view their role and click “Next.”
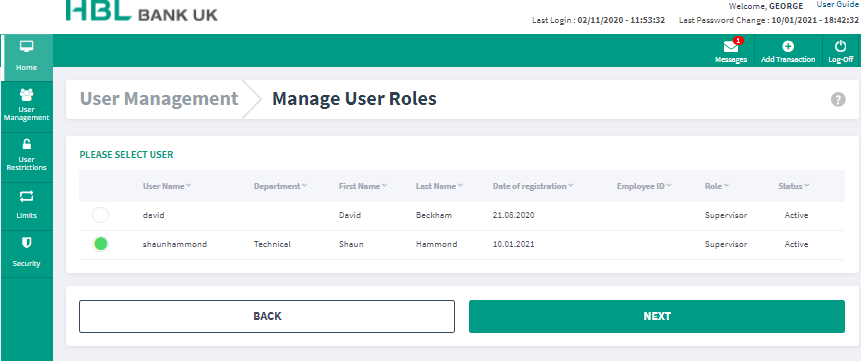
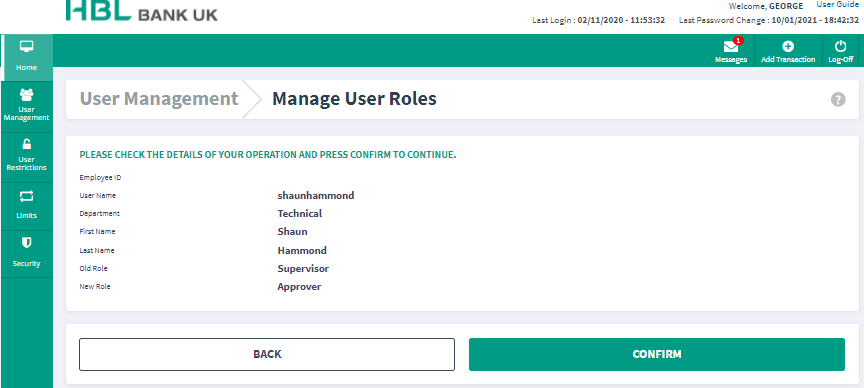
Under the heading, “Role Information” click and select the new role you intend to assign to your staff, then click “Next.”

A summary screen will appear showing the intention to assign a new role to the user. If you happy to
proceed, click “Confirm”
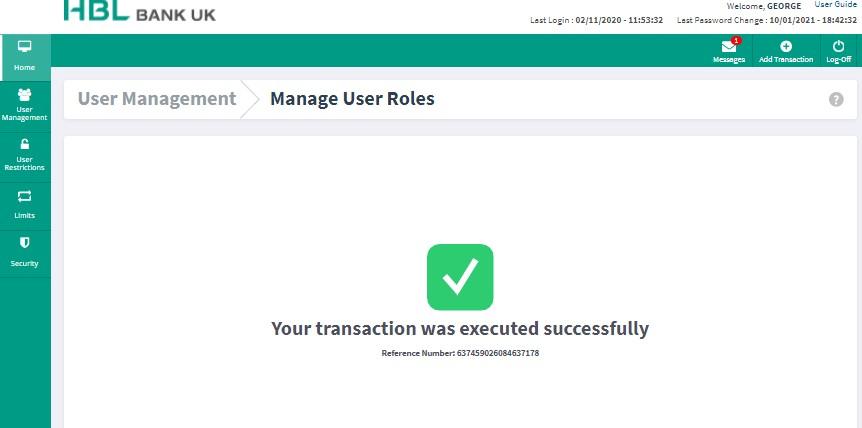
After assigning the new role, a confirmation screen will appear.
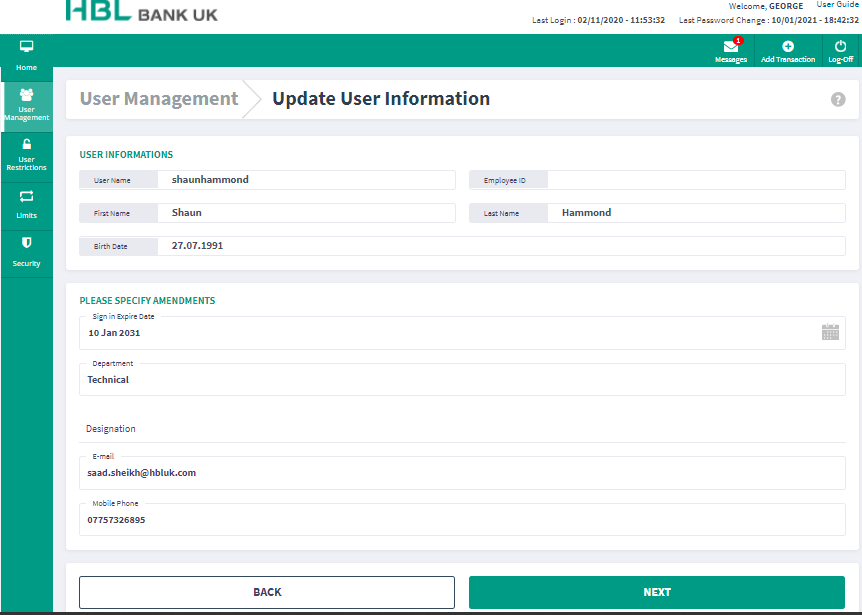
Update User Information
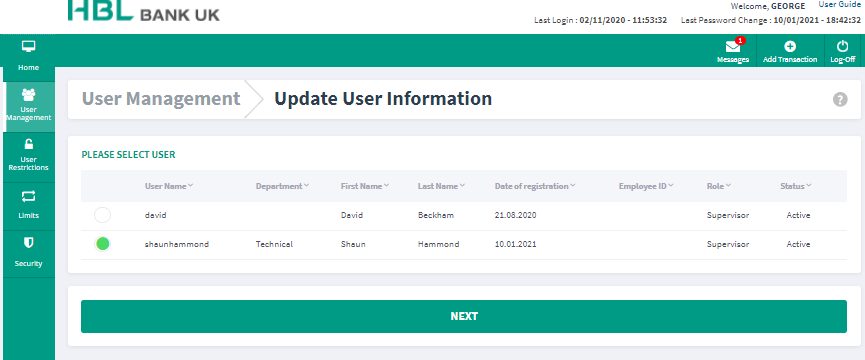
To update either the user’s, Sign in Expiry Date; Department; Email Address or Mobile Number, use this option. This can be selected via the main homepage or side panel under “User Management”
Select the user you intend to update their details and click “Next”
Amend the necessary details required on this screen and click “Next” once updated.
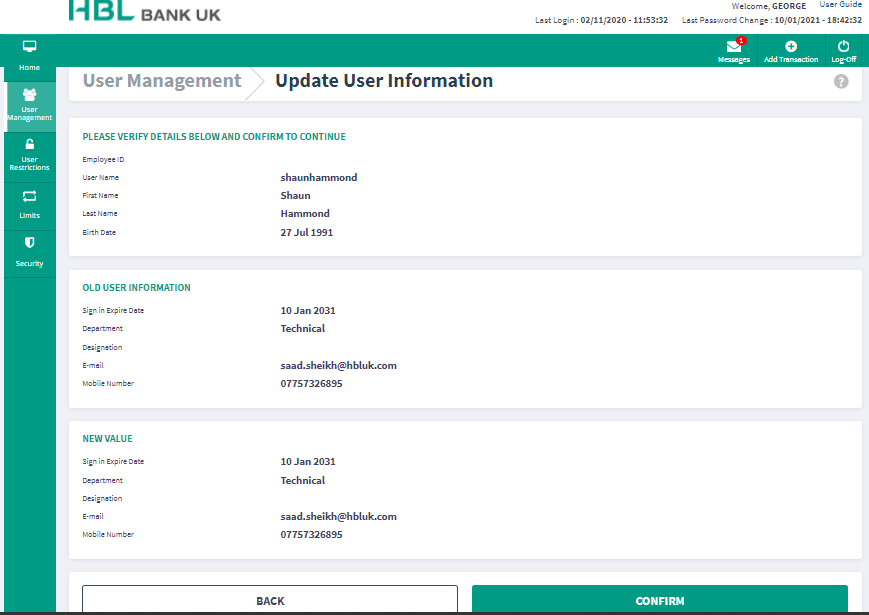
A summary screen will appear, once you are happy with the changes, click “Next”
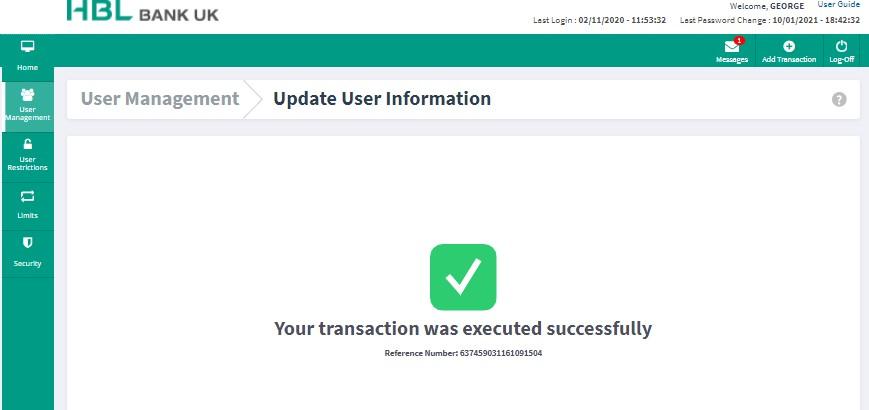
A confirmation screen will appear.
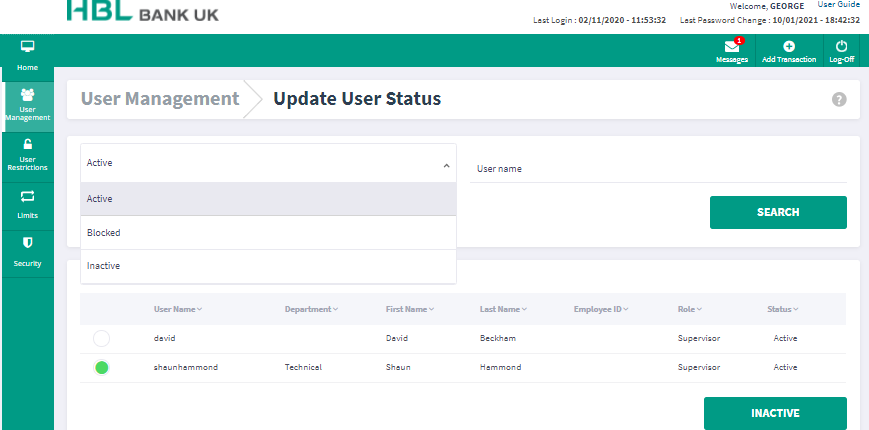
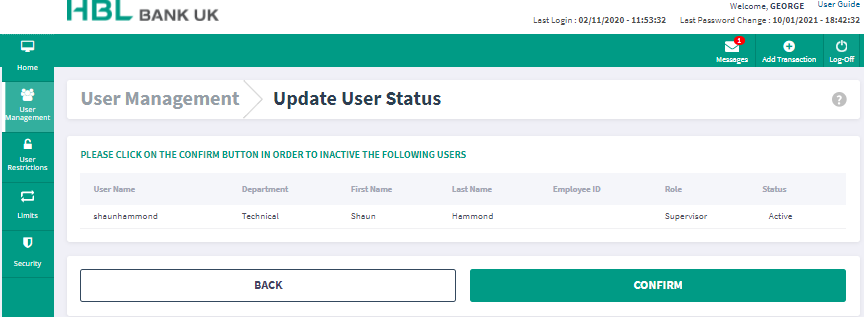
Update User Status
If you intend to change the status of a user, you can do so by clicking “Update User Status” via the main homepage or the side panel, “User Management”
Select or search your user and the “Status” you intend to assign. The options are, Active; Blocked and Inactive.
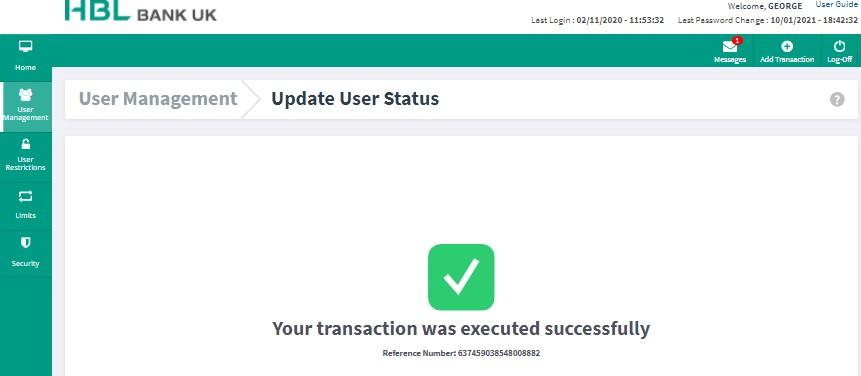
A summary screen will appear showing the new Status you intend to assign and click “Inactive” as a
confirmation.
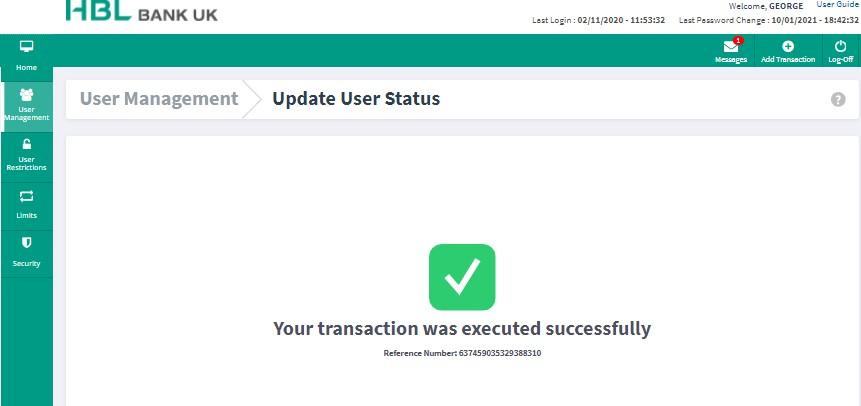
A summary screen will appear confirming your action.
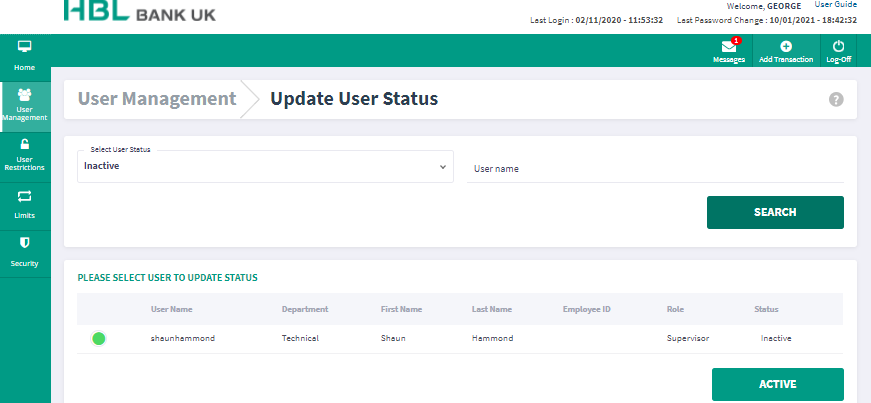
To reactivate the user, click on “Update User Status” and from the drop-down list, select the status you have assigned to the specific user or search via their username and click “Search”. Select the user and click “Active” in order reactivate their access for the pre-existing assigned role.
Review the summary screen and click “Confirm”
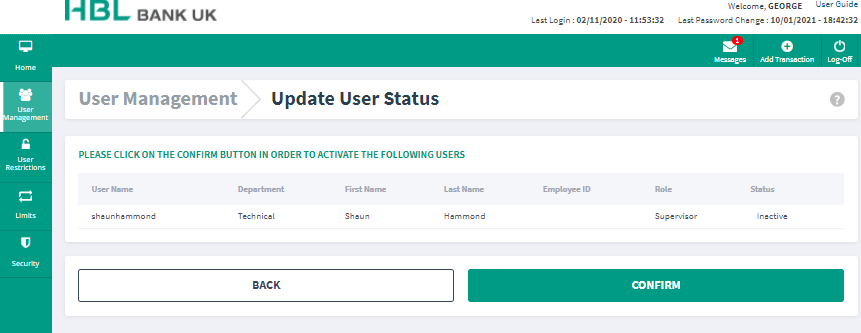
The confirmation screen will appear.
Delete User
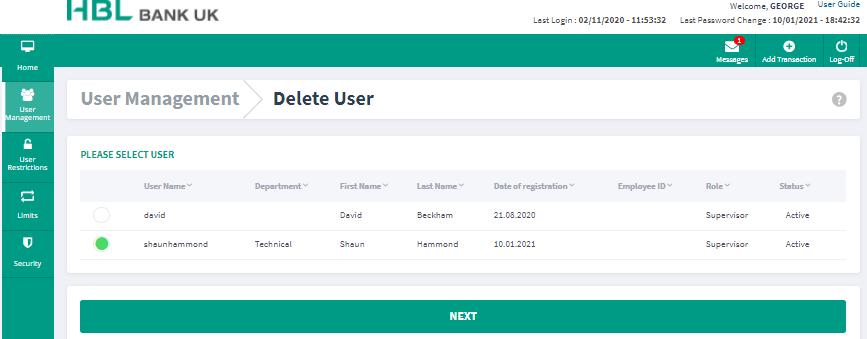
To delete a User, you can select click on “Delete User” via the homepage of under the side panel,
“User Management”
Select the User whose access you intend to delete.
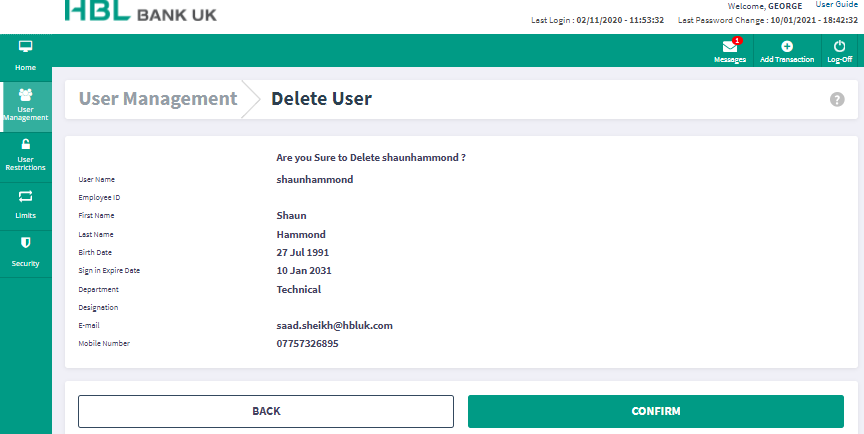
Review your action on the summary screen and click "Confirm" to proceed with deleting the user
confirmation screen.
Poster – Processing Payments
UK Payment
The user with the ‘Poster’ login will be able to execute payments, however, will require approval from either the ‘Approver’ or ‘Supervisor’ for the payments to be processed.
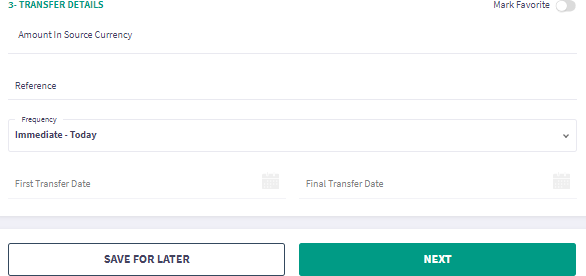
To process any payments, except Bulk Payment, select from the left hand menu “Payments & Transfers” and select “UK Payment” and select the debiting account and complete the beneficiary details and amount. Once completed, select “Next.”

Review the account details and amount keyed, agree to the Terms and Conditions and click
“Confirm.”
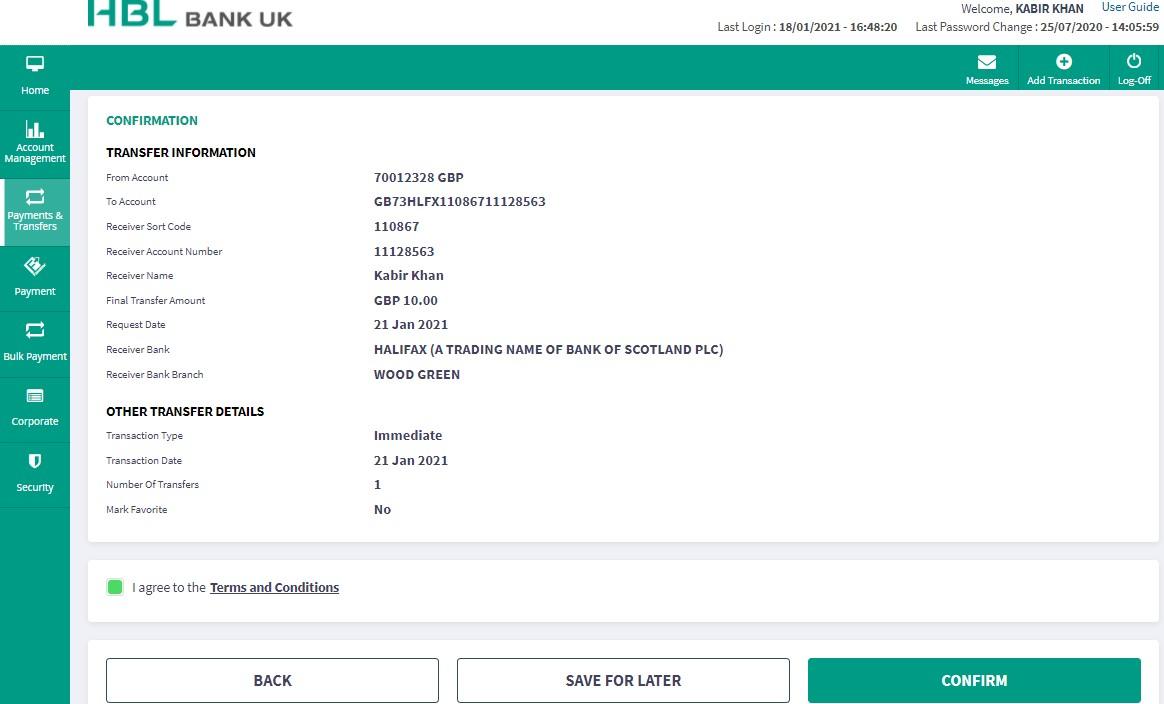
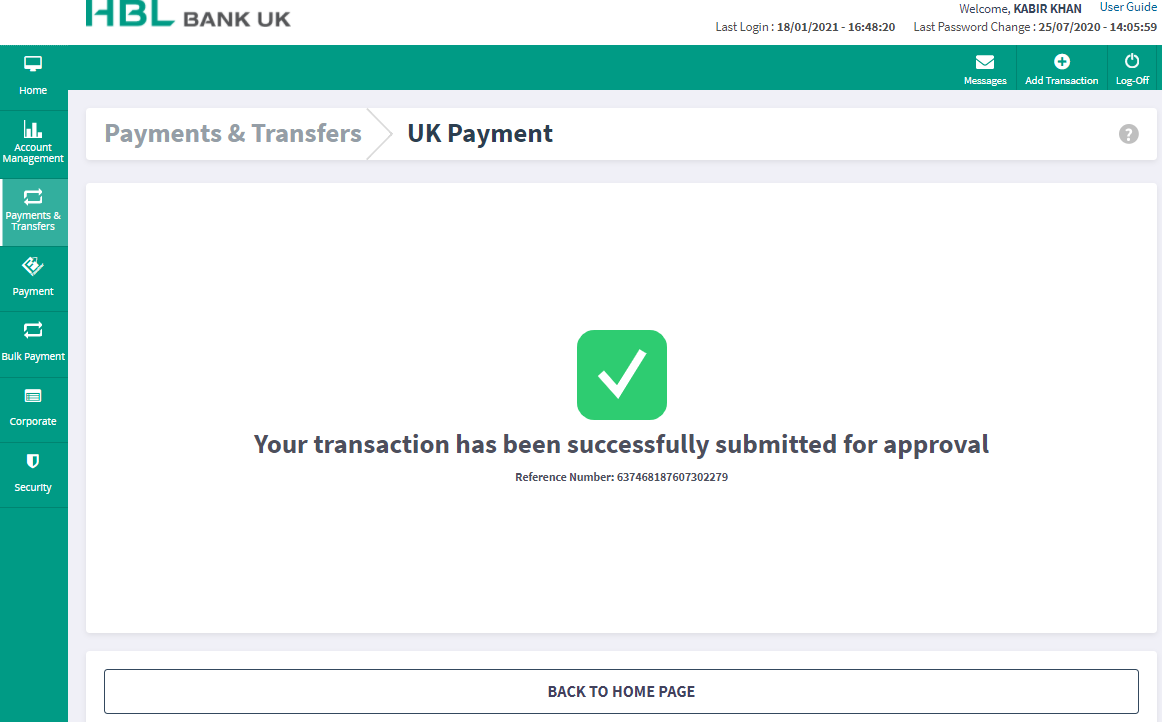
A confirmation screen will appear with the payment Reference Number which informing the transaction has been submitted to the approver.
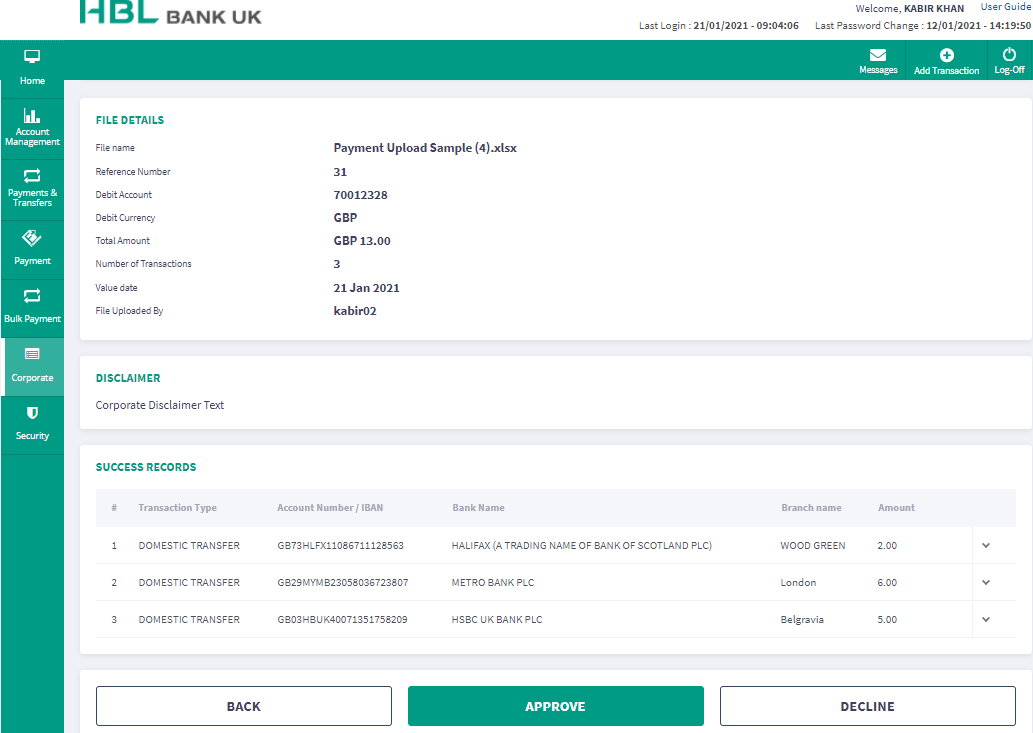
Bulk Payment
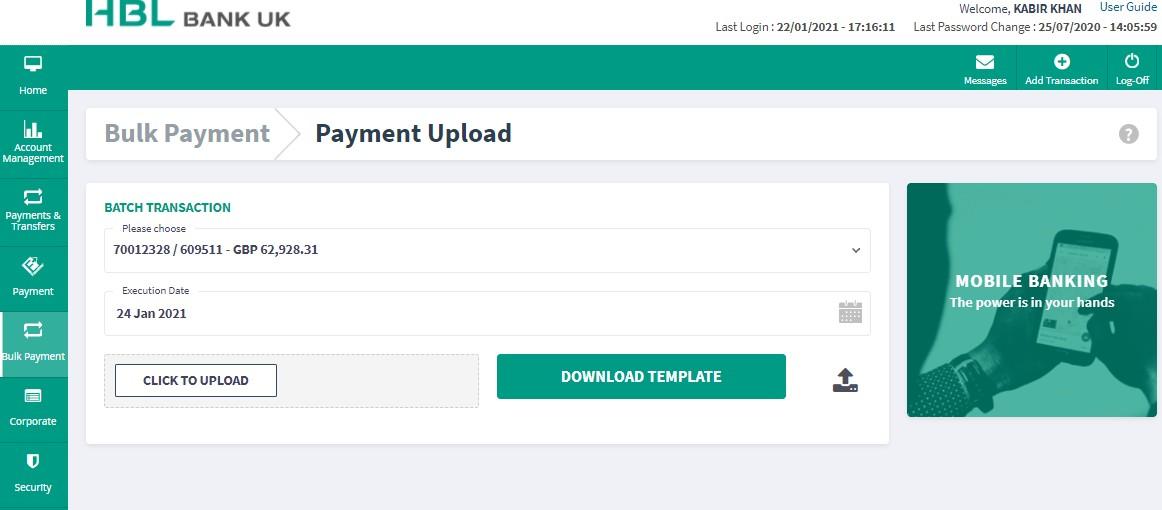
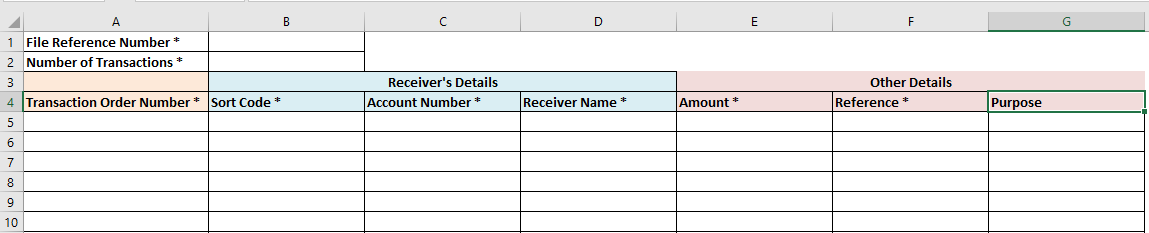
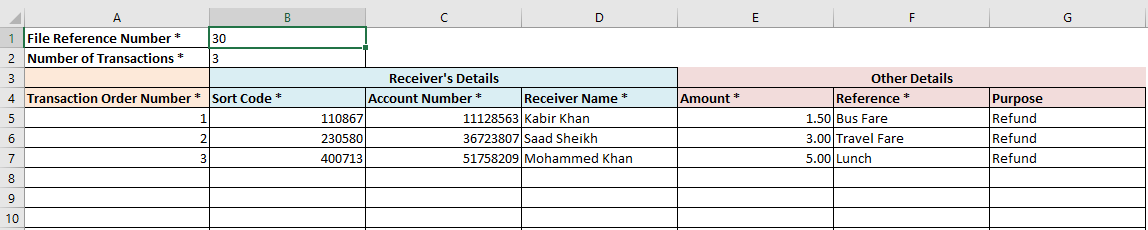
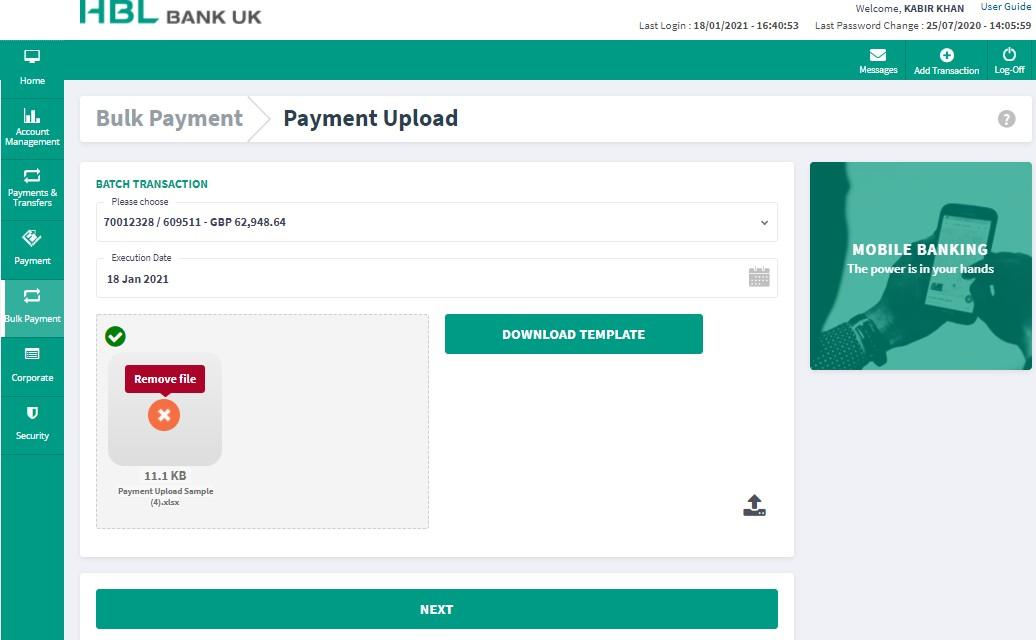
Select “Bulk Payment” from the side dashboard and select the account you intend to debit from the dropdown menu. Click on “Download Template” where a MS Excel workbook will be downloaded for you to complete. Please ensure that the "File Reference Number" is unique for each Bulk Upload..
Once completed, “Click to Upload” and click “Next.”
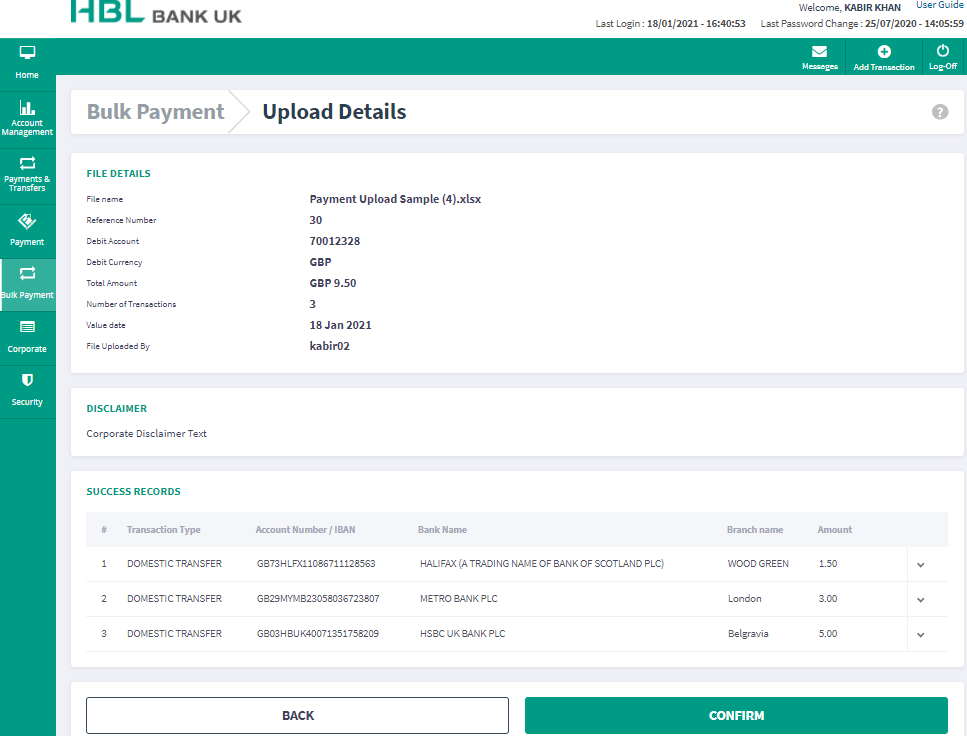
Review the payment details of the beneficiaries, click “Confirm” once you are ready to proceed.
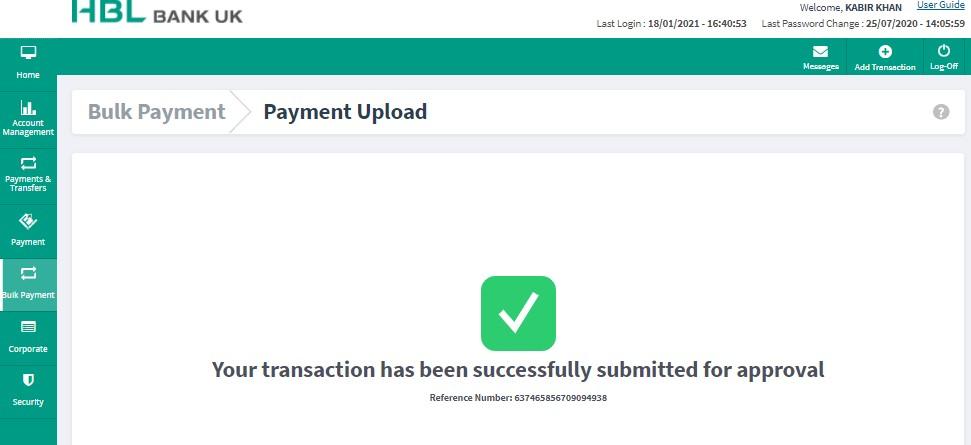
A confirmation reference number will appear for the "Approver/Supervisor" to view and approve
the payment.
The approver will be able to view all pending transactions when you click “Corporate” on the side menu and select “Pending Approval Transactions” and the same will appear on the Dashboard.

Approver/Supervisor – Approving Payments
All payments carried out by the ‘Poster’ user will appear on the Approver/Supervisor’s Dashboard and on the side Menu of under “Corporate.”
Please note that payments will only be accessible for viewing between 9 am and 5 pm on working days.
Dashboard - View
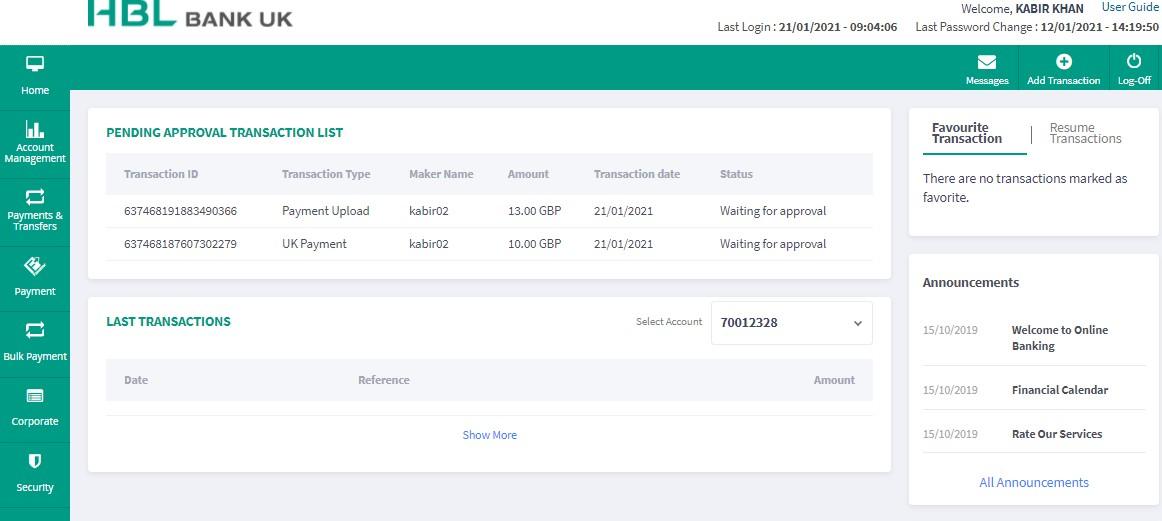
Corporate > Pending Approval Transaction List – View
Under this option, the Approver/Supervisor can view all types of transactions and requests within date ranges and as per the transaction ID (confirmation references).
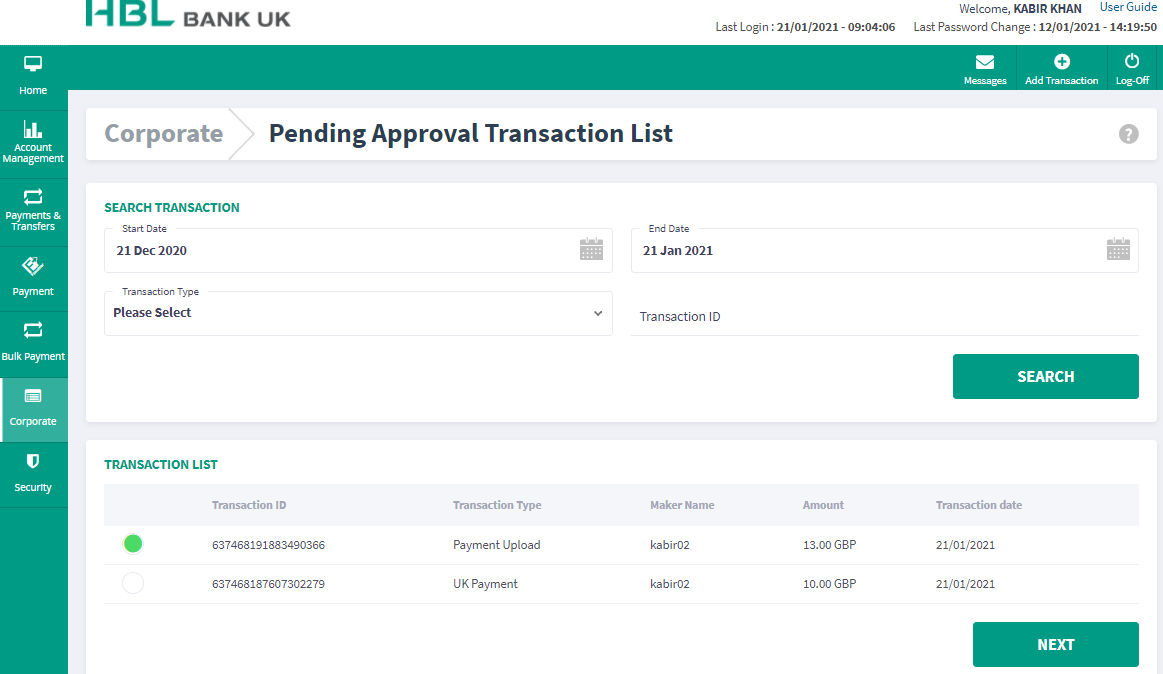
Review the transactions entered by the 'Poster' user and click "Approve" or "Decline" accordingly.
Bulk Payment - View
UK Payment – View
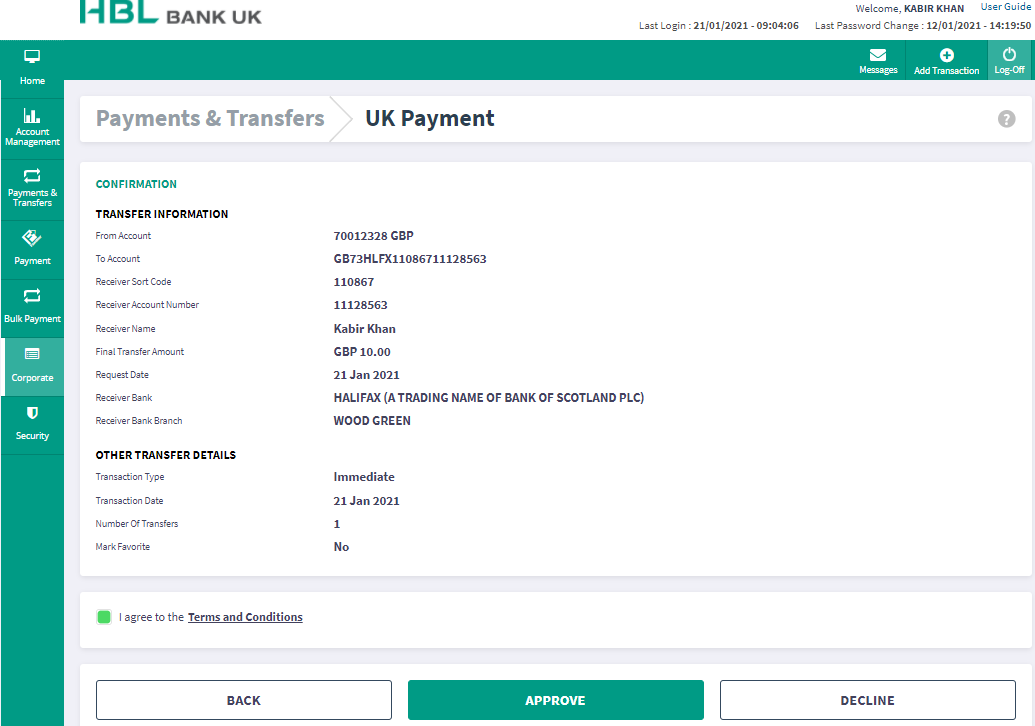
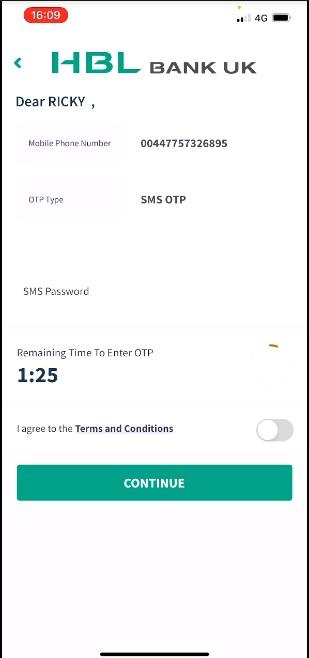
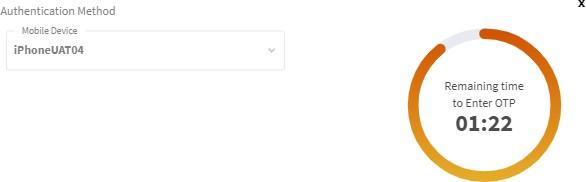
Authentication will be necessary via OTP to confirm the payment(s) for processing. Once entered, the payment will be processed accordingly.
0 Comments